前言
转载自:AkilarのIconfont Inject
效果预览
步骤
新建图标项目
- 访问阿里巴巴矢量图标库,注册登录。
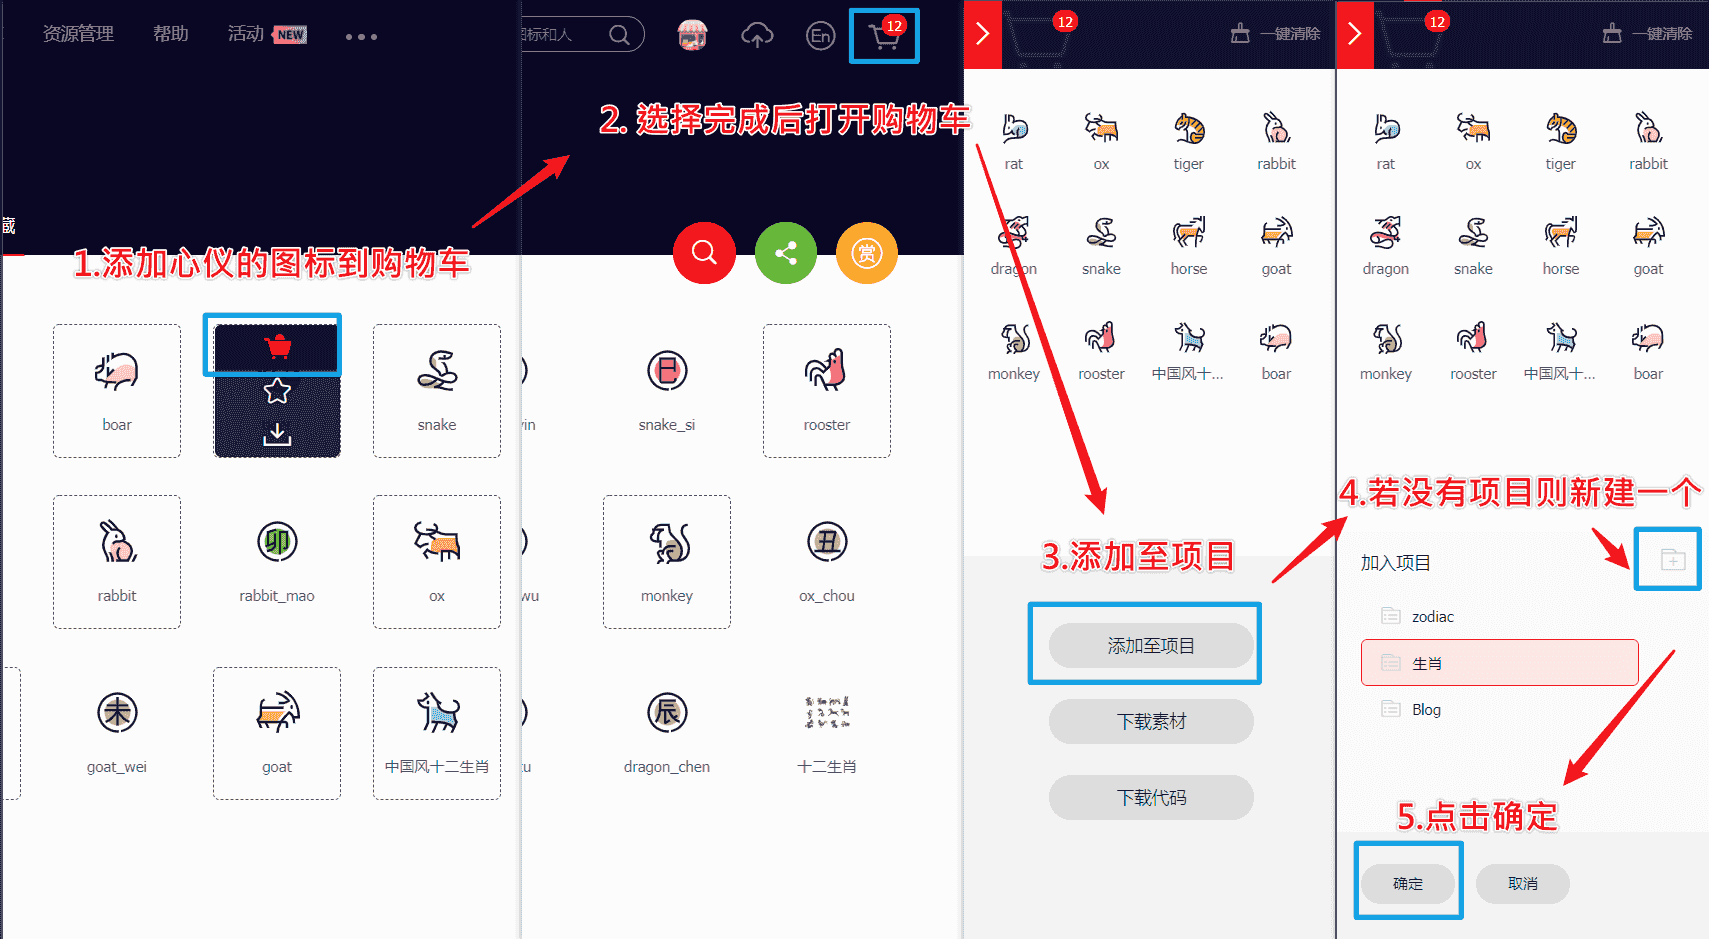
- 搜索自己心仪的图标,然后选择添加入库,加到购物车。
- 选择完毕后点击右上角的购物车图标,打开侧栏,选择添加到项目,如果没有项目就新建一个。

- 可以通过上方顶栏菜单->资源管理->我的项目,找到之前添加的图标项目。

引入图标
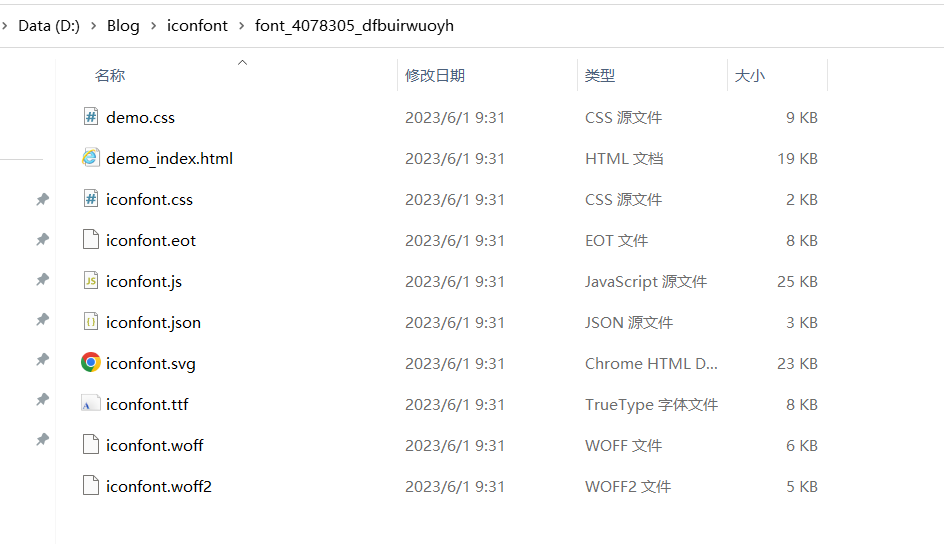
- 找到之前新建的图标项目,选择下载至本地,将图标库内容下载下来,然后解压得到下图文件:


将eot、svg、ttf、woff、woff2后缀的五个文件移至[Blogroot]\themes\butterfly\source\fonts\目录下,没有fonts新建即可
在[Blogroot]\themes\butterfly\source\css\custom.css中填写如下内容:
1
2
3
4
5
6
7
8
9
| @font-face {
font-family: 'iconfont';
src: url('/fonts/iconfont.eot');
src: url('/fonts/iconfont.eot?#iefix') format('embedded-opentype'),
url('/fonts/iconfont.woff2') format('woff2'),
url('/fonts/iconfont.woff') format('woff'),
url('/fonts/iconfont.ttf') format('truetype'),
url('/fonts/iconfont.svg#iconfont') format('svg');
}
|
- 打开
iconfont.css,复制其中形似如下的代码到[Blogroot]\themes\butterfly\source\css\custom.css中:
1
2
3
4
5
6
7
8
9
10
11
12
13
14
15
16
17
18
19
20
21
22
23
24
25
26
27
28
29
30
31
32
33
34
35
36
37
38
39
40
41
42
43
44
45
46
47
48
49
50
51
52
53
54
55
56
57
58
59
| .iconfont {
font-family: "iconfont" !important;
font-size: 3em;
font-style: normal;
-webkit-font-smoothing: antialiased;
-moz-osx-font-smoothing: grayscale;
}
.icon-rat:before {
content: "\e60e";
color: #85c3de;
}
.icon-ox:before {
content: "\e60c";
color: #ffaf6e;
}
.icon-tiger:before {
content: "\e611";
color: #f7c768;
}
.icon-rabbit:before {
content: "\e60d";
color: #ffbdd8;
}
.icon-dragon:before {
content: "\e609";
color: #ff8787;
}
.icon-snake:before {
content: "\e610";
color: #c3d686;
}
.icon-horse:before {
content: "\e60a";
color: #ffaf6e;
}
.icon-goat:before {
content: "\e608";
color: #f7c768;
}
.icon-monkey:before {
content: "\e60b";
color: #c3d686;
}
.icon-rooster:before {
content: "\e60f";
color: #ff8787;
}
.icon-dog:before {
content: "\e607";
color: #85c3de;
}
.icon-boar:before {
content: "\e612";
color: #ffbdd8;
}
|
使用图标
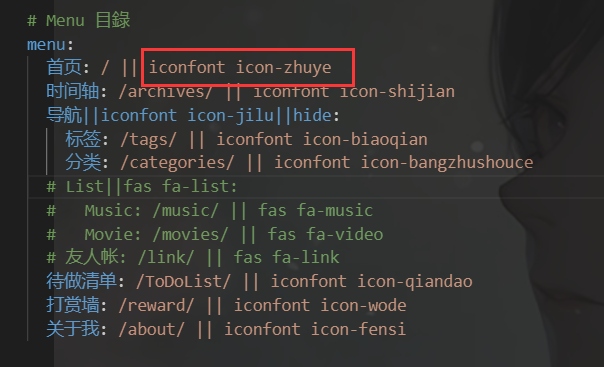
打开主题配置文件_config_butterfly.yml
使用格式:font-family名字(没有修改过一般都是iconfont) icon名称


